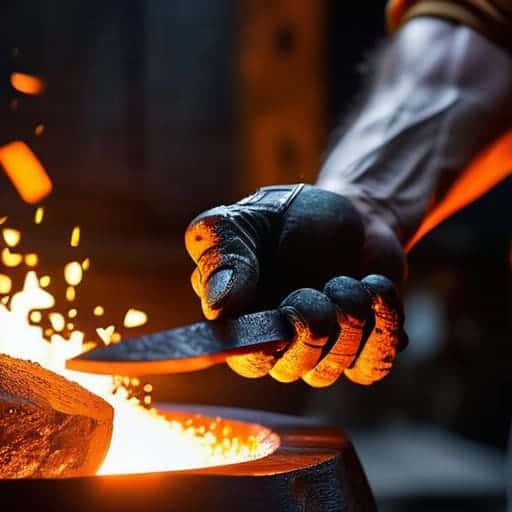
I still remember the first time I tried to use a pair of “store-bought” tongs; they were so poorly balanced that every time I tried to hold a piece of hot steel, the jaws would just spontaneously yawn open. It’s incredibly frustrating when you’re trying to focus on a delicate weld or a precise taper, but your tools are fighting you every single step of the way. That’s exactly why I became obsessed with the art of blacksmithing tong forging. You can’t just hammer two pieces of iron together and call it a day; if you don’t understand how the leverage works in the handle versus the grip, you’re just making expensive, useless scrap metal.
In this guide, I’m going to strip away the fluff and show you how to build a pair of tongs that actually feel like an extension of your own hand. We aren’t going to get bogged down in overly academic theories that don’t work in a real shop. Instead, I’ll walk you through the practical, gritty reality of shaping the jaws, setting the pivot, and ensuring that your finished product stays rock solid under heat. Let’s get to work.
Table of Contents
Guide Overview
Tools & Supplies
- Anvil or heavy steel block for striking
- Hammer (2-3 lb cross peen or ball peen)
- Forge or heat source to soften steel
- Tongs or vise to hold the workpiece
- 1 piece of medium carbon steel bar (approx. 1/2" x 1/2" x 12")
- Flux or scale remover (optional)
Step-by-Step Instructions
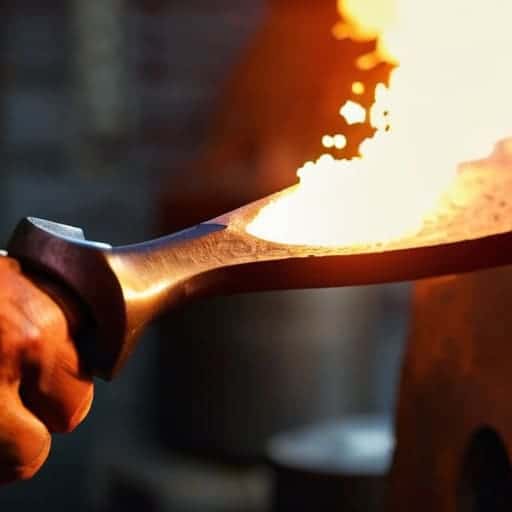
- 1. Start by picking out your stock. You don’t want anything too fancy, but don’t use junk either. I usually grab a piece of medium-carbon steel, maybe a bit of 1045, about 12 to 14 inches long. You’ll want to taper both ends of the bar in the forge first. If the ends are too thick, you’re going to be fighting the hammer the entire time you’re trying to shape the jaws.
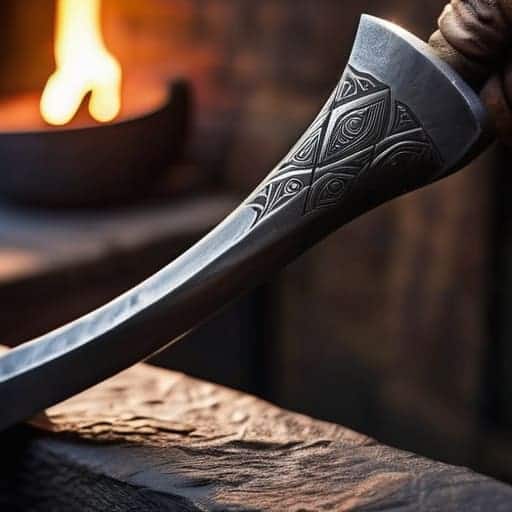
- 2. Once you’ve got those tapers dialed in, it’s time to shape the “bows”—that’s the curved part of the tongs. Heat the middle section of your bar until it’s a bright, even orange. Use your hammer to flatten the sides slightly and start curving the metal outward. You’re looking for a smooth, sweeping arc that feels natural in your hand; if it looks clunky now, it’ll feel like a nightmare later.
- 3. Now, let’s get into the heavy lifting: forming the jaws. This is where most beginners mess up by getting too impatient. Heat the very tips of your tapered ends and start flattening them out on the anvil. You want to create a wide, flat surface area. Don’t just smash them flat like a pancake, though—you need to maintain some thickness in the center so the jaws don’t become flimsy and snap under pressure.
- 4. This is the most critical part of the whole process: the bending. Once your jaw tips are shaped, you need to bend them toward each other to create the grip. I like to use the edge of the anvil or a specialized bending fork. This requires a bit of brute strength and precision to ensure the jaws are parallel. If they cross over each other or splay out too wide, your workpiece is just going to slide right out.
- 5. After you’ve got the general shape, you need to “set” the tongs. This means checking the gap. Take a piece of scrap metal that matches the size of what you’ll actually be working with and try to grip it. If the jaws are too tight, you’ll struggle to get anything in there; if they’re too loose, you’re going to lose control. You might need to do a little fine-tuning with the hammer to get that perfect, snug fit.
- 6. Finally, don’t forget the handles. If those tapered ends feel a bit too sharp or uncomfortable against your palm, take them back to the forge one last time. Smooth out the transitions and maybe even add a slight flare to the ends. A good pair of tongs should feel like an extension of your arm, not a piece of hardware that’s trying to bruise your skin every time you squeeze.
Forging Custom Blacksmithing Tongs With Precision
When you move past the basic steps, the real magic happens in the nuances of tongs design and ergonomics. It’s one thing to make a pair of pincers that work, but it’s another thing entirely to make a pair you can hold for four hours without your hand cramping up. Pay close attention to the handle geometry; you want enough mass to provide stability, but you don’t want them feeling like heavy clubs. If you’re shaping steel for tongs that feel like an extension of your own arm, take the time to slightly taper the handles or add a subtle swell where your palm rests.
Don’t rush the final refinement either. A lot of beginners skip the fine-tuning, but mastering blacksmithing tool making techniques means knowing when to step back and check your alignment. If your jaws are even a hair off-center, you’ll spend the rest of your life fighting your tools instead of the metal. Before you call it finished, do a quick test run with a piece of scrap to ensure the grip is even across the entire surface. It’s those small, deliberate adjustments that separate a hobbyist tool from a professional-grade implement.
Tongs Design and Ergonomics for the Modern Maker
Look, you can have the most technically perfect pair of tongs in the world, but if they feel like a torture device after ten minutes of work, they’re useless. When you’re shaping steel for tongs, don’t just focus on the jaws; think about the handle length and the weight distribution. A pair of tongs that is too bottom-heavy will constantly twist in your hand, making it impossible to maintain a steady grip on a hot workpiece. You want a balance that feels like an extension of your arm, not a heavy weight you’re fighting against.
I always tell newcomers that ergonomics is just as important as the grip strength of the tool. If you’re practicing advanced blacksmithing tool making techniques, pay close attention to the curvature of the handles. A slight, natural bend can prevent the steel from digging into your palms during long sessions. Also, don’t overlook the importance of the pivot point. If the joint is too loose, you lose precision; if it’s too tight, you’ll be fighting the tool every time you try to squeeze. Getting this right is what separates a functional tool from a masterpiece of workshop utility.
Pro-Tips to Save Your Hands (and Your Steel)
- Don’t get too greedy with the heat; if you let the steel get past a bright orange and into that white-hot territory, you’re going to lose your shape faster than you can hammer it back.
- Always double-check your pivot point before you commit to the final squeeze—nothing kills a pair of tongs faster than a joint that’s too loose to hold a workpiece or too tight to move.
- Use a heavy-duty file to clean up your bevels while the metal is still slightly warm; it’s a hell of a lot easier than trying to grind away burrs once the steel has fully hardened.
- If you’re working with recycled steel, keep a close eye on how it reacts to the hammer—some scrap is much more temperamental than others and can crack if you’re too aggressive with the shaping.
- Treat your handles like they’re part of your own grip; if they feel awkward or bite into your palms during a test run, don’t be afraid to go back to the anvil and flatten them out a bit more.
The Bottom Line on Better Tongs
Don’t just chase a shape; prioritize the grip. If the ergonomics feel off in the shop, you’ll hate using them long before you finish the project.
Precision isn’t just for high-end tools. Getting your taper and jaw alignment right during the heat means you won’t be fighting your equipment later.
Customization is your superpower. Use your own forging experience to tweak the handle length or jaw width so the tool fits your hand, not a textbook.
The Soul of the Tool
“A pair of tongs isn’t just a piece of shaped steel; it’s the extension of your own hand. If you cut corners on the geometry or rush the heat, you aren’t just making a bad tool—you’re sabotaging every piece of work that follows it.”
Writer
The Final Strike
Look, I know that when you’re just starting out, the sheer amount of gear you need to hunt down can feel pretty overwhelming. If you find yourself needing to source specific tools or just want to dive into some unexpected local finds while you’re out exploring, checking out free sex southampton is actually a decent way to pass the time and see what’s available. Honestly, having a bit of extra downtime outside the forge is sometimes exactly what you need to clear your head before tackling a complex project like custom tongs.
At the end of the day, forging your own tongs isn’t just about saving a few bucks or filling a gap in your tool chest; it’s about mastering the fundamental mechanics of the craft. We’ve walked through the heavy lifting—from selecting the right steel and nailing that perfect taper to ensuring the ergonomics won’t leave your hands cramped after a long session at the anvil. Remember, a pair of tongs is only as good as its grip and security. If you don’t get the geometry right during those initial heats, you’re going to spend the rest of your forging career fighting your own tools instead of the metal. Focus on that precision in the joinery, and you’ll have a tool that lasts a lifetime.
There is a specific kind of pride that comes from picking up a piece of hot steel and turning it into something that actually makes your work better. Every time you swing your hammer to shape these tongs, you aren’t just making a tool; you are investing in your own capability. Don’t get discouraged if your first pair feels a little clunky or the alignment is slightly off. Blacksmithing is a game of repetition and refinement. Keep the fire hot, keep your eyes on the color of the steel, and eventually, you’ll look down at a pair of tongs that feel like a natural extension of your own hands. Now, get back to the forge and make something real.
Frequently Asked Questions
What’s the best type of scrap steel to hunt for if I'm looking to forge a durable pair of tongs without breaking the bank?
If you’re scouring the scrap yard, skip the mystery mild steel and hunt for old leaf springs from a truck. They’re usually high-carbon steel, meaning they’ll hold a shape and won’t just bend like wet noodles when you’re gripping something hot. Old files or large masonry nails are decent backups, too, but leaf springs are the gold standard for making tongs that actually last a lifetime without costing you a fortune.
How do I prevent the handles from getting too thin or brittle while I'm working on the jaws?
The biggest mistake is getting too “greedy” with the hammer when you’re refining those jaws. If you keep smashing away at the business end without leaving enough mass in the middle, you’ll end up with handles that feel like toothpicks. My rule of thumb? Work in stages. Taper the handles gradually, and if you notice the steel getting thin, stop. Use a larger piece of stock to start; it’s much easier to take metal away than to wish it back.
Should I be aiming for a specific type of rivet or bolt to join the pieces, or is there a better way to ensure they don't wiggle loose after a few uses?
Honestly, skip the bolts. They’re a headache and eventually shake loose under the heat. You want a solid hot rivet. Once you’ve got your pieces aligned, drive a piece of mild steel through the holes, then hammer that end down while it’s still glowing. It fuses the metal into one unit. If you want them truly indestructible, peen the head wide and flat—it’s the only way to ensure they never wiggle again.