I still remember the first time I tried to get a smooth gradient on a piece of cherry wood; I spent four hours sweating over a burning tip, trying to draw “perfect” lines, only to end up with a scorched, muddy mess that looked more like a burnt pancake than art. I was following every “professional” tutorial online that told me I needed a $500 precision burner and a steady hand like a surgeon to succeed. But here’s the truth they don’t tell you: if you want that deep, soulful texture that actually catches the light, you have to stop trying to draw and start learning the rhythm of stipple pyrography. It isn’t about precision lines; it’s about the controlled chaos of the dot.
Look, I’m not here to sell you on some expensive, high-tech gear or give you a lecture filled with academic fluff. I’ve spent way too many late nights covered in wood dust to do that. Instead, I’m going to show you exactly how to master the tap, how to control your heat without losing your mind, and how to turn a flat piece of timber into something with real dimension. This is the raw, unvarnished truth about getting the technique right the first time.
Table of Contents
Mastering the Art of Wood Burning Pointillism
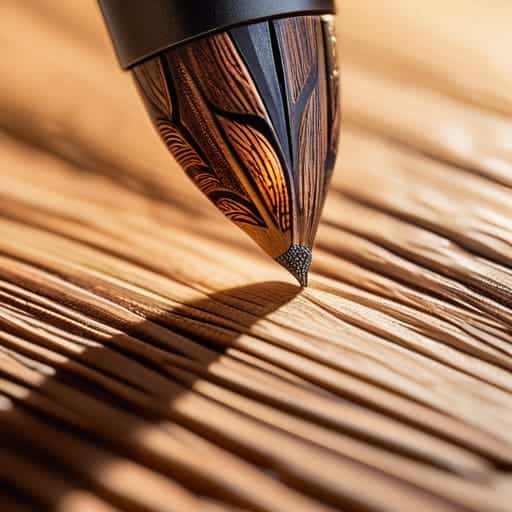
When you first pick up your burner to try wood burning pointillism, the temptation is to rush. You want to fill the space, but if you go too fast, you end up with a messy, scorched blotch rather than a deliberate mark. The secret is all in the wrist. Instead of dragging the tip across the grain, you need to treat the wood like a canvas for tiny, controlled explosions of heat. Think of it as a rhythmic dance; you aren’t just burning holes, you are building a visual language one dot at a time.
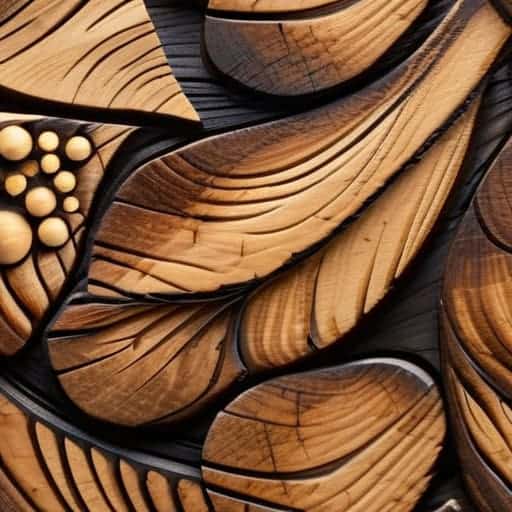
To really nail the transition from light to dark, you have to understand the nuance of stippling vs shading in wood burning. While traditional shading relies on sweeping motions to create gradients, pointillism relies on density. If you want a shadow to feel heavy and grounded, cluster your dots tight together until they almost merge. If you’re looking to capture those subtle wood grain texture effects, spread them out. It’s that intentional spacing that creates the illusion of three-dimensional form, turning a flat piece of timber into something that feels alive.
Pyrography Stippling Techniques for Emotional Impact
When you’re deep in the zone, trying to find that perfect rhythm between the heat of the pen and the grain of the wood, it helps to have a little mental reset to keep your focus sharp. I’ve found that taking a quick break to check out something completely different, like sex leicester, can actually be a great way to clear your head before diving back into those intricate, tiny details. It’s all about maintaining that creative flow, and sometimes a little distraction is exactly what you need to come back to your piece with a fresh set of eyes.
It’s easy to get caught up in the technical side of things, but if you want your piece to actually feel something, you have to stop thinking about dots and start thinking about light. When you’re practicing pyrography stippling techniques, remember that the density of your marks dictates the mood. A sparse, airy collection of points can make a piece feel ethereal or sun-drenched, while tight, heavy clusters create a sense of heavy shadow or even melancholy. It’s not just about filling space; it’s about controlling the visual weight of the image to guide the viewer’s eye.
The real magic happens when you start creating depth with wood burning by varying your pressure and frequency. Instead of just making uniform dots, try letting some clusters bleed into one another to mimic soft, natural shadows. This is where the nuance of wood burning pointillism really shines—it’s the difference between a flat drawing and a piece that looks like it has a heartbeat. Don’t be afraid to let the natural imperfections of the wood play a role; sometimes the most emotional impact comes from how your marks interact with the organic flow of the grain.
Pro Tips for Finding Your Rhythm
- Don’t fight the wood grain; instead, use it. If you’re working on a piece with a heavy texture, let your stippling follow the natural flow of the fibers to make the shading feel like it’s actually part of the tree, not just sitting on top of it.
- Watch your heat levels like a hawk. It’s tempting to crank up the temperature to get a dark dot fast, but that’s the quickest way to get a “crater” instead of a soft gradient. Keep it lower and build that depth through patience, not power.
- Stop thinking in lines and start thinking in density. The secret to a smooth transition isn’t how hard you press, but how close those dots are huddled together. Tight clusters for the shadows, and let them breathe as you move toward the light.
- Vary your tip contact time. If you hit every single dot with the exact same pressure and duration, your piece is going to look mechanical and sterile. Give it some soul by letting some dots linger just a millisecond longer than others.
- Test your “burn depth” on a scrap piece of the exact same wood first. Every species reacts differently to the heat—what works on smooth basswood might look like a mess on a more porous cedar. Always do a quick “test tap” before committing to the main piece.
The Soul in the Stipple: Quick Lessons for Your Next Burn
Stop chasing perfect lines; the magic of stippling lies in the organic, slightly irregular rhythm of the dots that mimic natural light and shadow.
Control your depth by varying your pressure and heat, not just your speed—it’s the subtle shifts in dot density that turn a flat image into something three-dimensional.
Patience is your most important tool, so embrace the slow build of a gradient rather than rushing to fill the space and ruining the wood’s texture.
## The Soul in the Stipple
“Stippling isn’t just about making marks; it’s about the patience of a thousand tiny decisions. You aren’t just burning wood—you’re coaxing light out of the darkness, one single, rhythmic dot at a time.”
Writer
Finding Your Rhythm
At the end of the day, stipple pyrography isn’t about achieving some impossible level of photographic perfection; it’s about understanding how light and shadow dance across the grain. We’ve walked through the mechanics of pointillism, the technical nuances of tool pressure, and how to use those tiny, scorched dots to pull actual emotion out of a flat piece of timber. Whether you are building up deep, moody gradients or keeping things light and airy, the secret lies in the patience you bring to the wood. Remember, every single dot is a deliberate choice that contributes to the soul of the final piece.
So, stop overthinking the precision and just start tapping. There is something deeply meditative about the rhythmic click of the burner against the wood, a cadence that forces you to slow down and truly connect with your medium. Don’t be afraid to mess up a gradient or lose your place; those tiny “mistakes” often become the very textures that give your work its character. Grab your wood, find your light, and let the rhythm of the stipple guide your hands. You aren’t just burning wood; you are breathing life into it, one dot at a time.
Frequently Asked Questions
How do I keep my stippling consistent without my hand getting shaky or tired halfway through?
Look, the “shaky hand” struggle is real, and it usually happens because you’re fighting your own body. Stop trying to hover mid-air like a surgeon. Instead, anchor yourself—rest the side of your hand or your pinky on a bridge or a steadying block. Also, take breaks before the cramp hits. If you’re gripping that pen like your life depends on it, you’ve already lost. Loosen up, breathe, and let the rhythm take over.
What kind of wood grain works best for this—will a heavy grain ruin the dot patterns?
Honestly, a heavy grain can be a total nightmare if you’re aiming for precision. If the wood is too “busy,” those deep ridges will swallow your dots or make them look uneven, totally killing your gradient. For stippling, you really want something tight and consistent—think cherry, maple, or basswood. You want a smooth canvas so the texture comes from your handiwork, not from fighting the wood itself.
Should I be using different temperature settings for dense clusters versus light shading?
Absolutely. If you try to tackle dense clusters at a low temp, you’ll end up fighting the wood, dragging the tool around and losing that crispness. Crank the heat up for those deep, concentrated spots to get that punchy contrast. For the light, airy shading, dial it back. You want a gentle singe that blends seamlessly, not a harsh crater. Think of it like adjusting your pressure—temperature is just another layer of control.