I still remember the first time I tried decoupage furniture – I was skeptical, to say the least. A friend had told me it was a game-changer for revamping old pieces, but I wasn’t convinced. That was until I saw the transformation for myself. The common myth that decoupage is only for antique pieces or that it’s a time-consuming, tedious process couldn’t be further from the truth. With the right techniques and materials, you can give any piece of decoupage furniture a fresh new look that’s both unique and eye-catching.
In this article, I’ll share my honest, no-nonsense advice on how to decoupage furniture like a pro. You’ll learn the essential steps to prepare your piece, choose the right paper and paste, and apply the decoupage with ease. From common mistakes to avoid to expert tips for achieving a flawless finish, I’ll cover it all. By the end of this guide, you’ll be equipped with the knowledge and confidence to breathe new life into your old furniture and create one-of-a-kind pieces that reflect your personal style. Whether you’re a seasoned DIY enthusiast or a beginner looking for a fun and creative project, this guide will show you how to make decoupage furniture that’s truly beautiful and functional.
Table of Contents
Project Overview
Total Time: 2 hours 30 minutes
Estimated Cost: $20 – $50
Difficulty Level: Intermediate
Tools Required
- Utility Knife ((with extra blades))
- Paintbrush ((various sizes))
- Rags ((for cleaning))
- Credit Card or Similar Tool ((for smoothing paper))
- Pencil ((for marking furniture))
- Eraser ((for correcting marks))
- Cutting Mat ((for protecting work surface))
- Scissors ((for cutting paper))
- Sealant ((such as varnish or polyurethane))
Supplies & Materials
- Furniture to Decoupage ((such as a chair, table, or box))
- Cut Paper Images ((in desired designs and sizes))
- Decoupage Medium ((such as glue or varnish))
- Primer (optional) ((for preparing surface))
- Paint (optional) ((for base coat or additional design))
- Clear Coat ((for protecting the decoupage))
- Sandpaper ((for smoothing surface))
- Drop Cloths or Newspaper ((for protecting work area))
Step-by-Step Instructions
- 1. First, gather your materials, which should include the furniture piece you want to decoupage, cut-out images or paper of your choice, a glue brush, a cup of water, and some varnish for the final protective coating. Make sure your workspace is clean and dry to avoid any mess or damage to your materials.
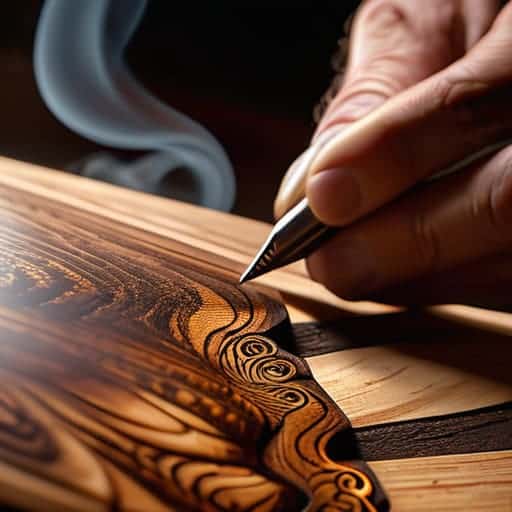
- 2. Next, prepare your furniture by cleaning it thoroughly with a damp cloth to remove any dirt or wax. If your piece has a glossy finish, lightly sand it to create a better surface for the glue to adhere to. This step is crucial for ensuring your decoupage lasts and doesn’t peel off easily.
- 3. Now, select and cut out your images. Choose papers or images that resonate with you, whether they’re vintage prints, botanical drawings, or pieces of music sheets. Cut them out carefully with scissors or a craft knife, depending on the intricacy of the design. Remember, the more precise your cuts, the cleaner your final result will be.
- 4. Apply a thin, even layer of decoupage medium or glue to the area where you’ll be placing your first cut-out. Don’t overdo it, as too much glue can cause the paper to wrinkle or become too transparent. Gently place your cut-out onto the glued area, starting from the center and smoothing it outwards with your fingers or a brush to remove any air bubbles.
- 5. Continue applying your cut-outs, working in small sections to maintain evenness and to avoid the glue drying out before you can place your paper. Use a damp brush to smooth out any wrinkles or air pockets as you go. It’s also a good idea to alternate the direction of your pieces or play with the pattern to create a visually interesting design.
- 6. Once all your pieces are applied, allow the glue to dry completely, which could take anywhere from 15 minutes to an hour, depending on the humidity and the type of glue you’re using. Then, apply a second coat of varnish or sealant to protect your work and give it a glossy finish. This step is essential for making your decoupage durable and resistant to scratches or spills.
- 7. Finally, after the varnish is completely dry, add any finishing touches, such as painting on additional details or applying gold leaf for a luxurious look. Be creative and have fun with this step, as it’s where you can really make your piece unique. Remember, decoupage is all about expressing your personality and style, so don’t be afraid to experiment and try new things.
Decoupage Furniture Magic
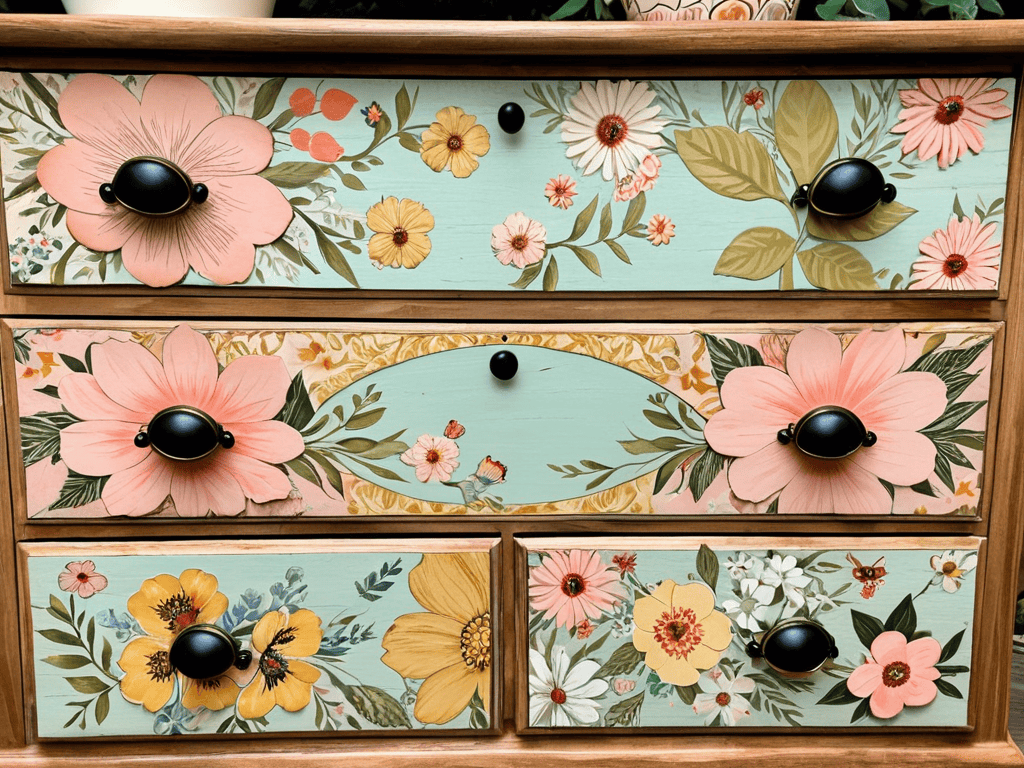
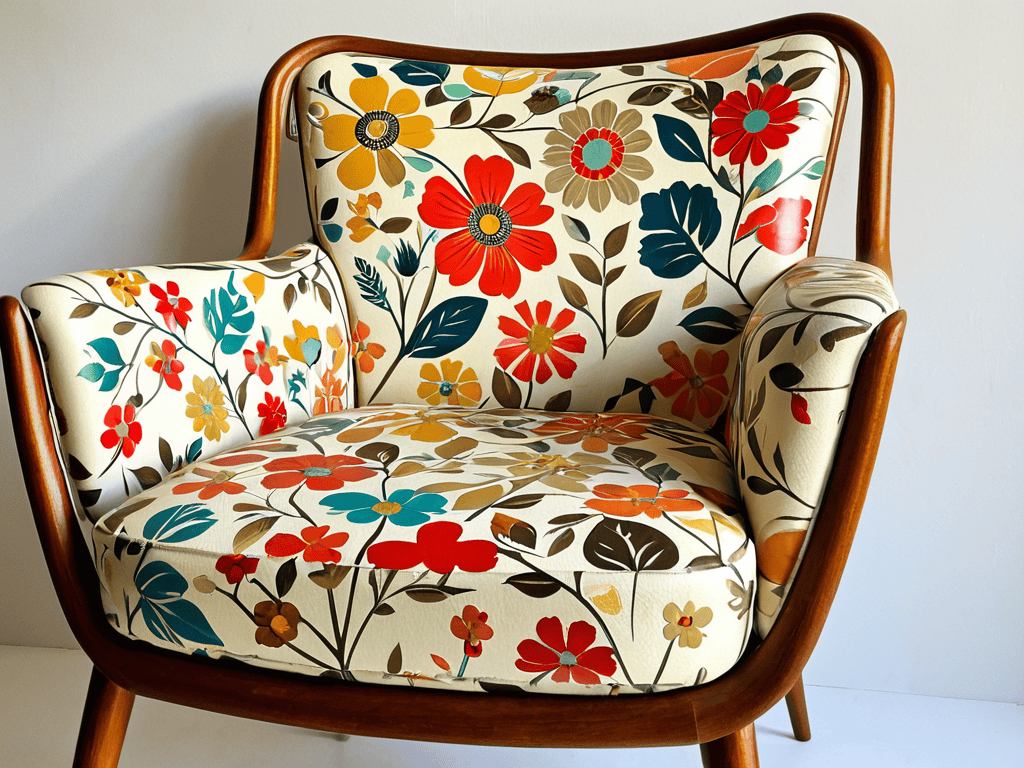
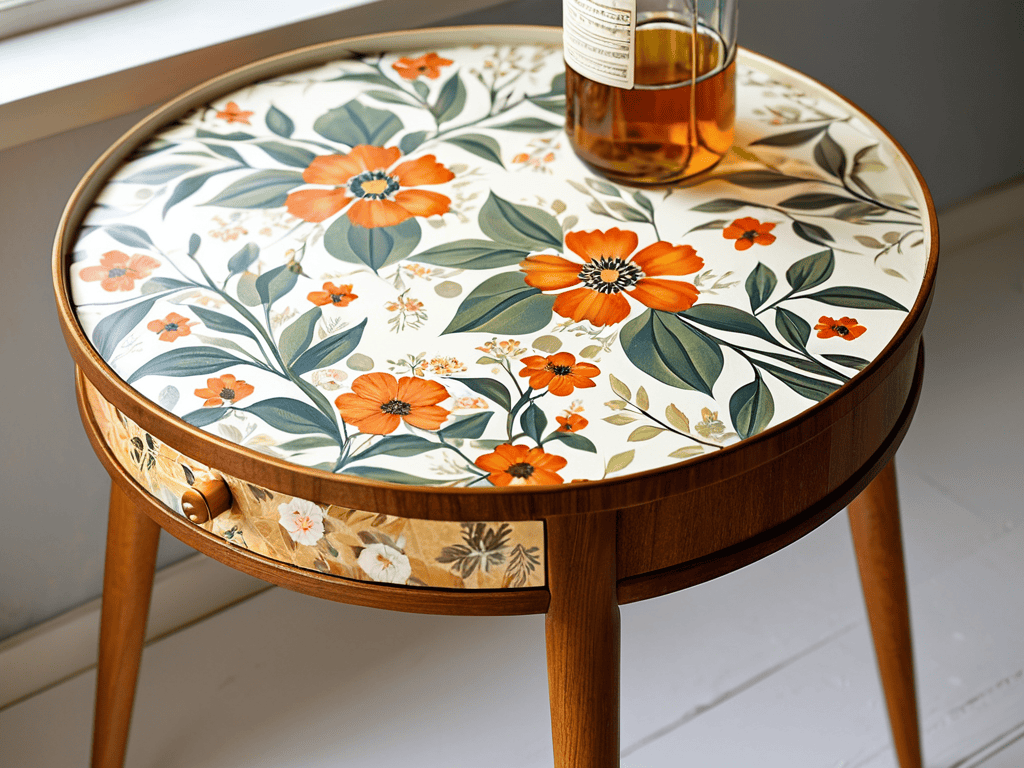
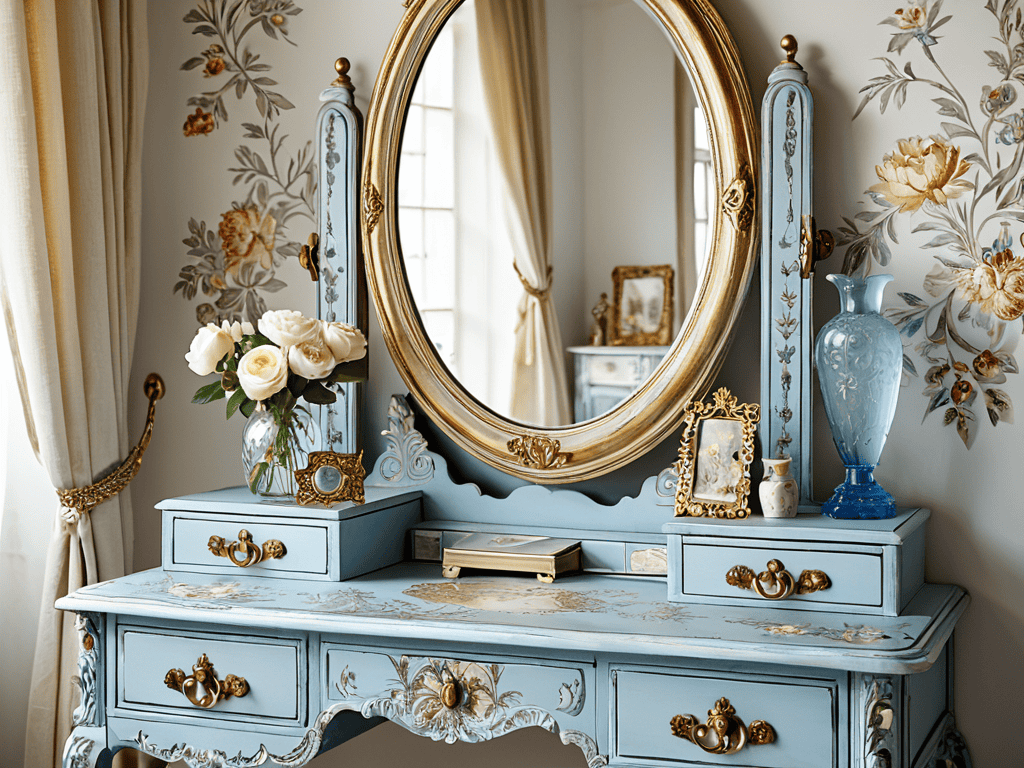
As I delve deeper into the world of furniture upcycling, I’ve discovered that the right paper choice for decoupage can make all the difference. The texture, color, and pattern of the paper can add a unique personality to the piece, making it truly one-of-a-kind. I’ve experimented with various types of paper, from vintage prints to handmade designs, and each one has brought a new level of character to the furniture.
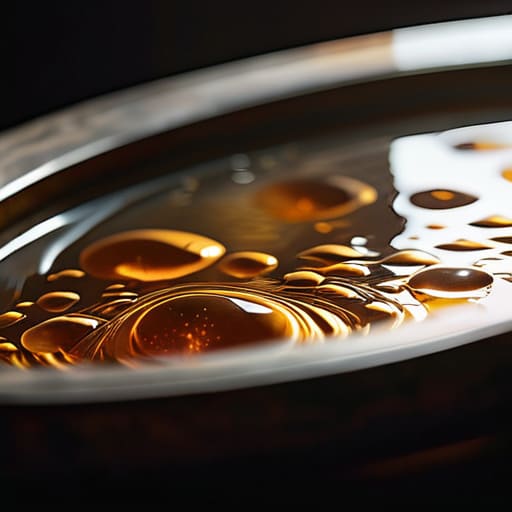
When it comes to sealing the decoupage for durability, I’ve found that a good varnish can work wonders. It not only protects the paper from wear and tear but also adds a nice sheen to the finish. Sealing decoupage for durability is an often-overlooked step, but it’s essential for ensuring that the piece withstands the test of time. By taking this extra step, you can enjoy your beautifully decoupaged furniture for years to come.
For those looking to turn their passion for decoupage into a furniture flipping business, I would advise them to experiment with different decoupage design inspiration and techniques. Don’t be afraid to try out new and bold designs, and don’t limit yourself to just one style or theme. The key to success lies in creating unique and eye-catching pieces that stand out from the crowd.
Paper Choice Secrets Revealed
As you continue to explore the world of decoupage furniture, you may find yourself wanting to connect with like-minded individuals who share your passion for creative expression. If you’re looking to expand your social circle and meet new people who appreciate the beauty of handmade crafts, I’ve discovered a wonderful online community that’s perfect for making meaningful connections. You can visit sex personals to find local groups and forums where people gather to share their love for art, design, and of course, decoupage furniture. By joining these communities, you’ll not only gain inspiration from others but also have the opportunity to showcase your own unique pieces and receive feedback from those who truly appreciate the art of decoupage.
When it comes to decoupage, the paper you choose can make all the difference. I’m obsessed with vintage prints and vibrant colors – they add such a unique touch to any piece. From antique book pages to handmade paper, the options are endless. Experimenting with different textures and patterns can help you achieve a one-of-a-kind look that reflects your personality.
For a more subtle approach, consider using tissue paper or delicate cut-outs. These can add a touch of whimsy and romance to your furniture, creating a soft, ethereal quality that’s perfect for a shabby chic or bohemian-inspired space.
Sealing for Durability Tips
To really make your decoupage furniture pieces last, sealing them is a must. I swear by a good varnish or polyurethane coat – it adds a layer of protection against scratches and spills. Apply a thin layer, let it dry, and then add a second coat for extra durability.
I’ve found that water-based sealers are easier to work with, especially for beginners. They clean up easily and dry quickly, plus they won’t yellow over time like some oil-based products can. Experiment with different finishes, like matte or gloss, to find the look that suits your piece best.
5 Essential Tips to Elevate Your Decoupage Furniture Game
- Start with a strong foundation: ensure your furniture is clean, dry, and free of dust and debris before applying decoupage
- Choose the right adhesive: select a varnish or glue that suits the type of paper and surface you’re working with to avoid peeling or bubbling
- Experiment with layering: build up layers of cut-out images, textures, and patterns to add depth and visual interest to your decoupage design
- Don’t forget to seal your masterpiece: apply a clear coat of varnish to protect your decoupage from wear and tear, and to give it a beautiful, glossy finish
- Add a personal touch: incorporate meaningful objects, like family photos, ticket stubs, or other memorabilia, to make your decoupage furniture truly one-of-a-kind
Key Takeaways to Revitalize Your Furniture
I’ve learned that with the right paper choice and a little creativity, decoupage can completely transform the look and feel of old furniture, giving it a unique and personalized touch
Sealing your decoupage masterpiece is crucial for durability, and using the right varnish or sealant can make all the difference in withstanding the test of time and use
By following these simple steps and tips, you can unlock the magic of decoupage and breathe new life into old, worn-out furniture, turning it into stunning, one-of-a-kind pieces that reflect your personality and style
A Labor of Love
Decoupage isn’t just about gluing paper to furniture, it’s about telling a story, one delicate layer at a time, and giving old, worn-out pieces a chance to whisper their tales once more.
Emily J. Miller
Conclusion
As we conclude this journey into the world of decoupage furniture, it’s essential to remember the basics: choosing the right paper, applying the perfect amount of paste, and sealing your work for durability. We’ve also explored the magic of decoupage, from revealing the secrets of paper choice to tips for sealing your masterpieces. By following these steps and tips, you’ll be well on your way to creating unique, personalized pieces that reflect your personality and style.
So, the next time you’re thinking of giving new life to an old piece of furniture, consider the transformative power of decoupage. With a little patience and creativity, you can turn a bland, outdated item into a stunning work of art that becomes the centerpiece of any room. As you embark on your decoupage journey, don’t be afraid to experiment and try new things – it’s all part of the fun and creative process that makes decoupage so rewarding.
Frequently Asked Questions
Can I decoupage any type of furniture, or are some materials better suited for this technique?
While you can decoupage most furniture types, some materials work better than others. Generally, wood, metal, and glass surfaces yield great results, but avoid decoupaging plastics or fabrics, as the adhesive might not hold well.
How do I prevent air bubbles from forming under the paper when I apply the decoupage medium?
To avoid those pesky air bubbles, I apply a thin, even layer of decoupage medium to the furniture, then gently place the paper on top. Using a credit card or similar tool, I smooth out the paper from the center outwards, making sure to remove any air pockets as I go – it’s all about being gentle and patient!
Will decoupage damage my furniture over time, or is it a durable and long-lasting decoration method?
Don’t worry, decoupage is surprisingly durable when done right. With proper sealing, your design can last for years without fading or peeling. I’ve had pieces that still look great after a decade with minimal wear. Just make sure to use a good sealant and avoid exposing it to excessive moisture or direct sunlight.